How to Customize Your AnyDesk Client with a Personalized Logo: Step-by-Step Guide
Customizing Your AnyDesk Client with a Personalized Logo
Customizing your AnyDesk client with a personalized logo is a great way to make a lasting impression on your clients. Follow these simple steps to add your logo:
- Log in to the AnyDesk Customer Portal.
- Go to the Builds menu.
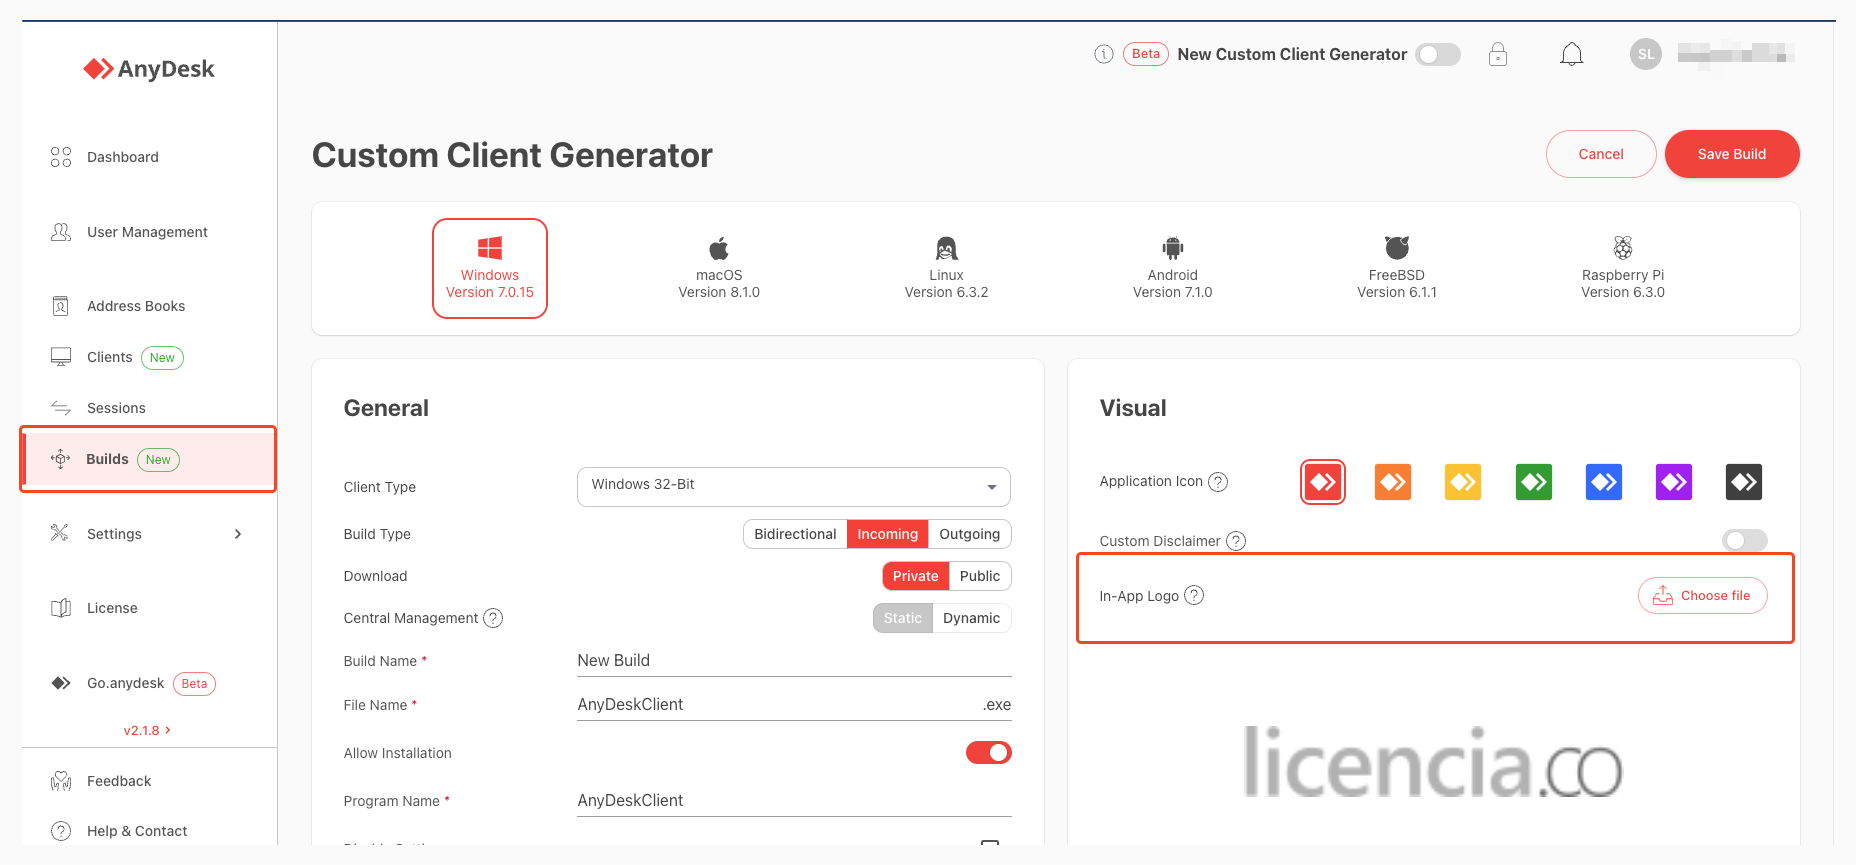
- To create a new custom client, click on Create build. If you want to edit an existing custom client, select the desired client and click on Edit Build.
- In the Visual > In-App Logo section, click on Choose file and select the logo you want to use.
- Click on Save build.
- Download the custom client and deploy the installation on your devices.
Important Reminders:
- The image must be in PNG or JPEG format.
- The maximum allowed size is 1 MB.
- It is recommended to use a horizontal image of 200x40 pixels.
- Changing the logo of a custom client requires the reinstallation of the client, even for those with Central Management functionality enabled.
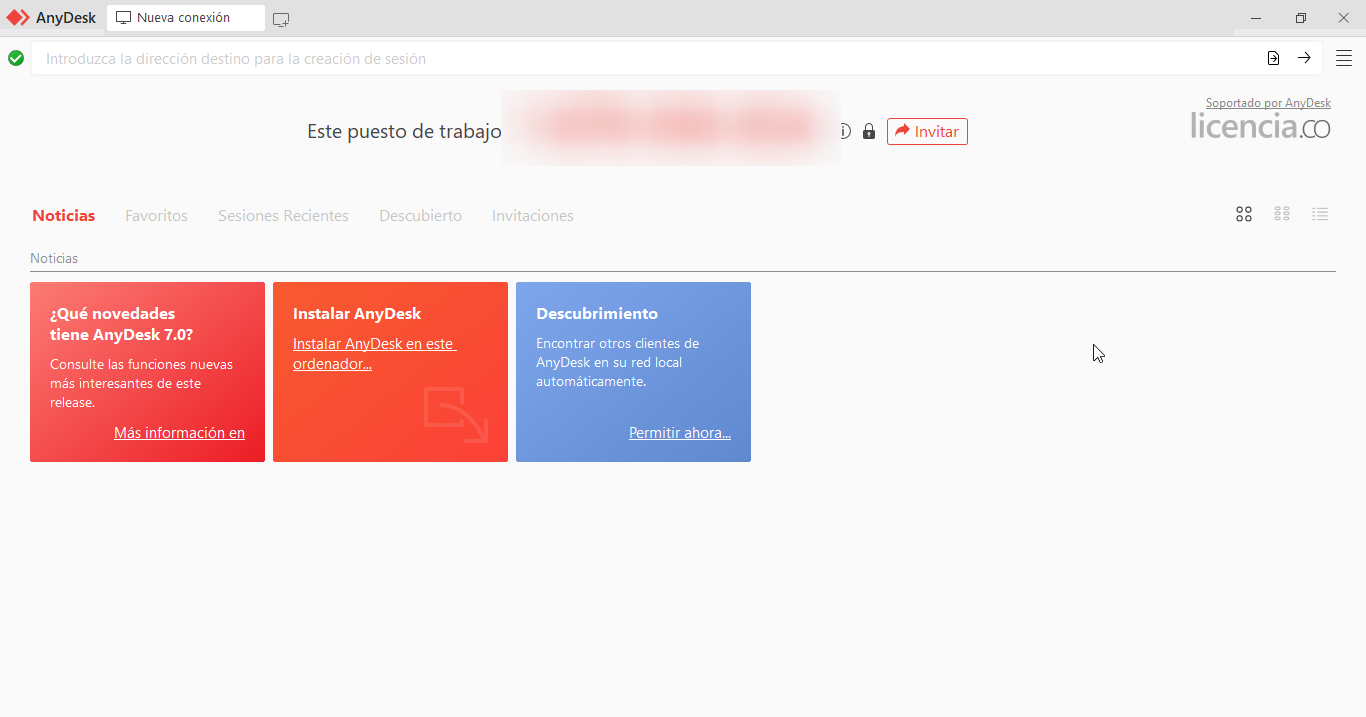
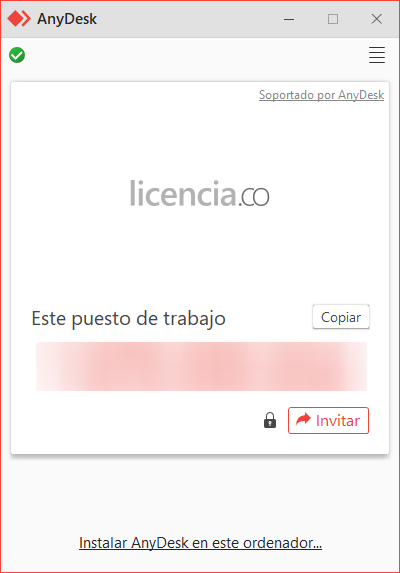
Once deployed, the selected logo will be visible in the AnyDesk client, depending on the type of connection enabled (incoming and outgoing / incoming only).
Client with Incoming and Outgoing Connections Enabled
Client with Incoming Connections Only Enabled
- Published at