How to Disable Unattended Access on Your Device: A Step-by-Step Security Guide
Have you recently hired an IT technician to help with a technical issue or taken your device to a service center? If so, it’s essential to ensure that no unauthorized access can occur in the future. Follow these steps to verify that unattended access is disabled on your device:
Step-by-Step Guide to Disable Unattended Access
-
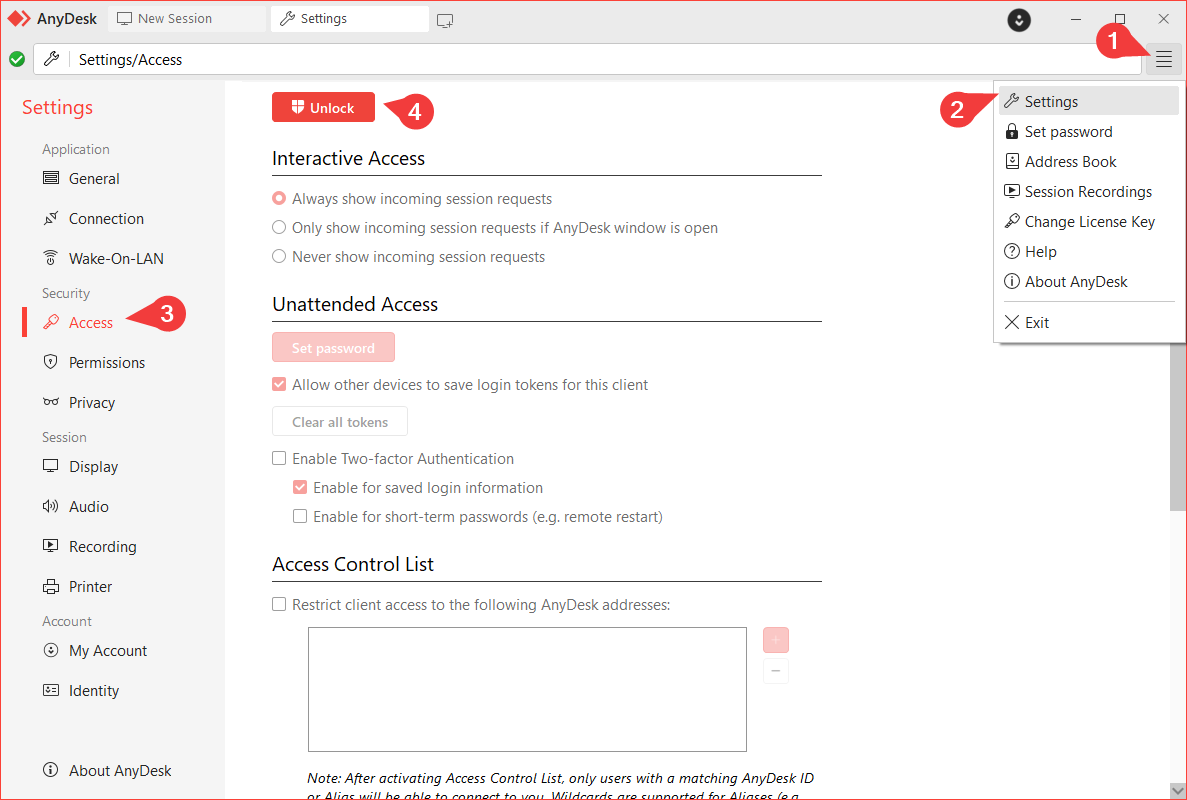
Unlock Access Settings
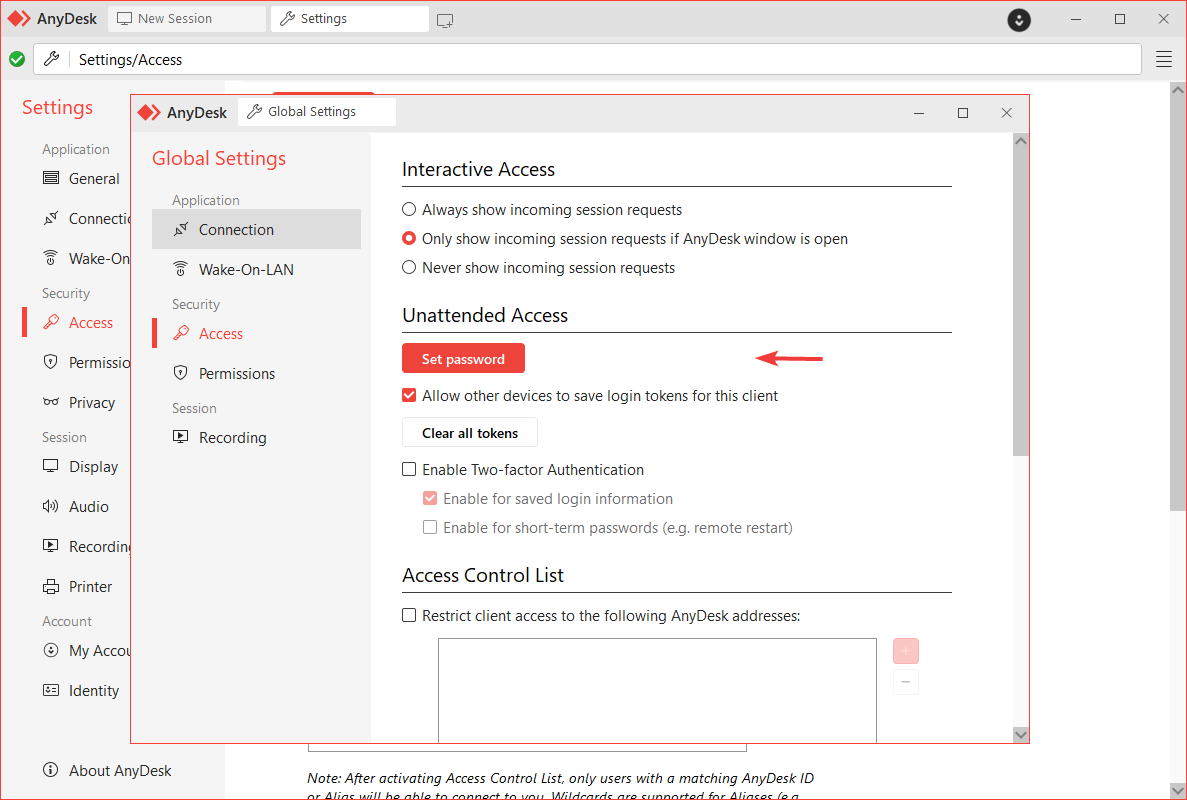
Navigate to the main menu, and click on Settings > Access > Unlock.
-
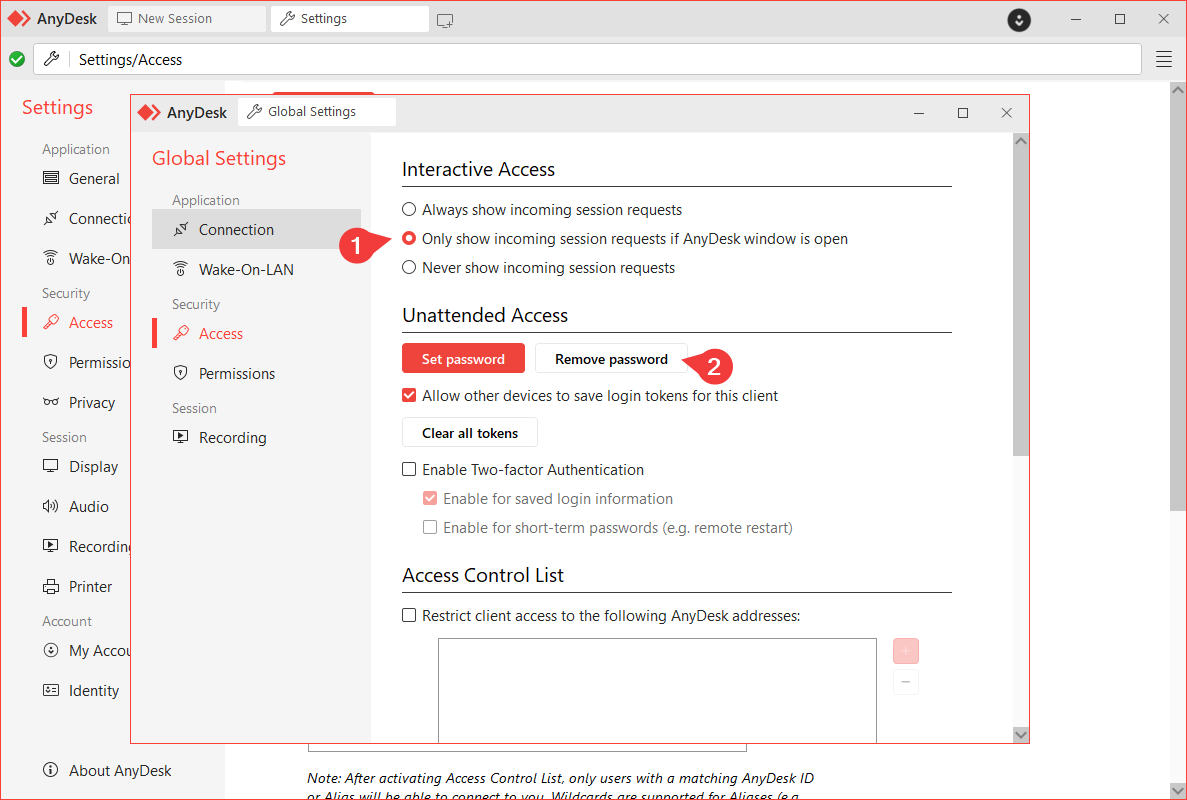
Adjust Connection Request Preferences
Select the option labeled “Show connection requests only if AnyDesk is open.” If you see the “Remove password” button, click on it. If this button doesn’t appear, it indicates that there is no configured connection to your device that could allow access without your permission.
-
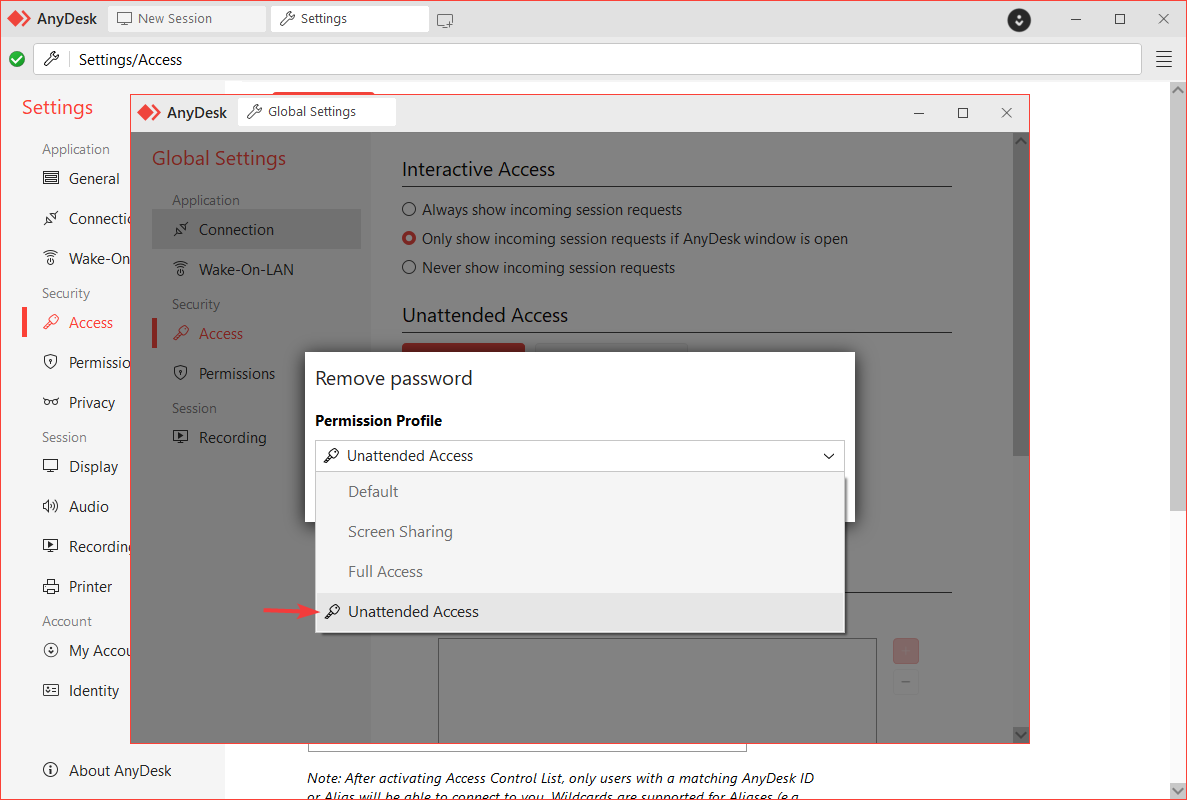
Review Profiles with Access Keys
Carefully select each profile that displays a key icon.
-
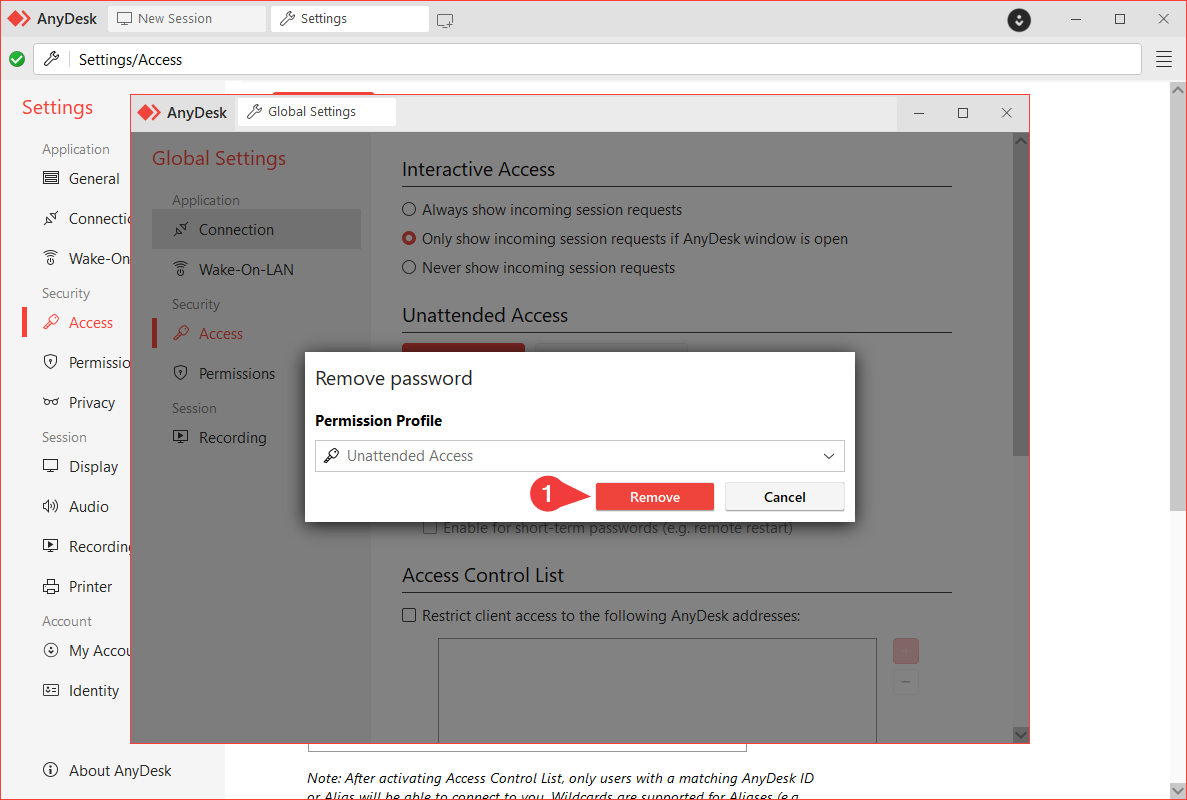
Remove Unauthorized Profiles
Click on the “Remove” option for each profile you wish to eliminate.
-
Confirm the Removal
If the “Remove password” button no longer appears, it means that there are no connections configured to your device that could allow access without your consent.
By following these steps, you can ensure that your device remains secure and that you are in control of any access granted. It’s always good to regularly check your device’s security settings, especially after seeking technical assistance. Keep your information safe!
- Published at