How to Download, Install, and Configure TeamViewer for Remote Access: A Step-by-Step Guide
Introduction
TeamViewer is a widely-used tool for remote device control, enabling users to connect to other computers, share files, and provide technical support from a distance. In this tutorial, you’ll learn how to download, install, and configure TeamViewer on your device.
Step 1: Download TeamViewer
-
Visit the official TeamViewer website: Open your browser and head to the official TeamViewer page at www.teamviewer.com.
-
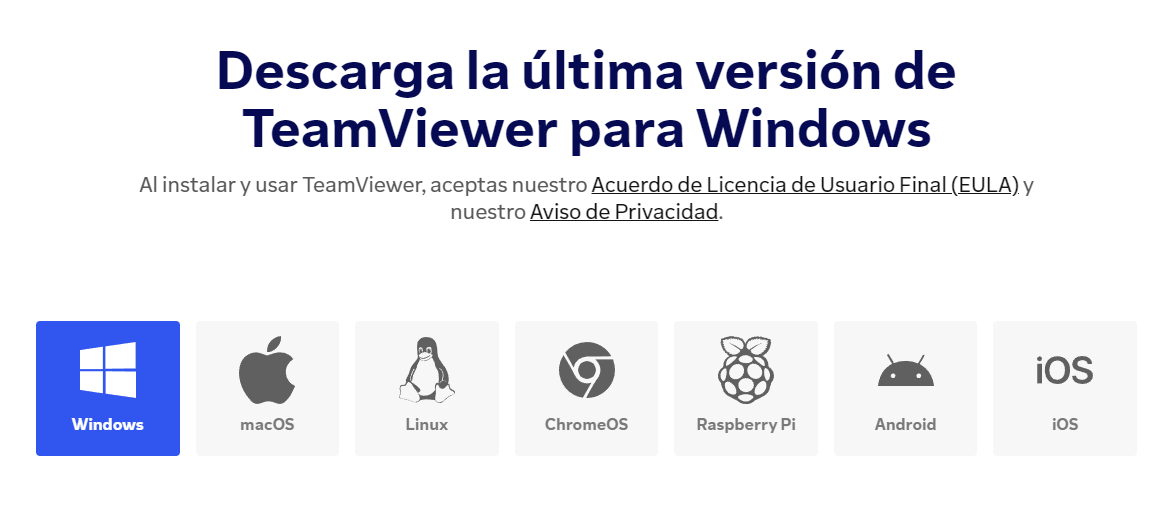
Select your operating system: TeamViewer is available for multiple platforms including Windows, macOS, Linux, Android, and iOS. Depending on the device you are using, click the corresponding download button.
-
Download the installer file: Once you’ve selected your operating system, the download will begin automatically. The file will be saved in your device’s default downloads folder.
Step 2: Install TeamViewer
-
Open the downloaded file: Navigate to the folder where the file was downloaded and double-click the installer to open it.
-
Follow the installation wizard instructions:
- Choose whether you want to install TeamViewer for personal use or for business purposes.
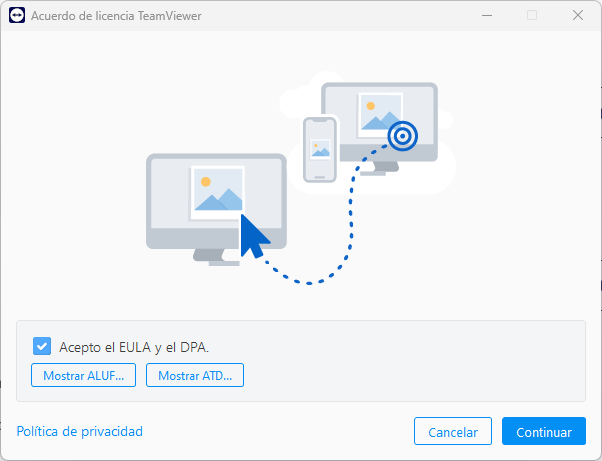
- Accept the terms and conditions.
- Click on Install to begin the installation process.
-
Wait for the installation to finish: Once completed, the installer will notify you that TeamViewer has been successfully installed.
Step 3: Initial Setup of TeamViewer
-
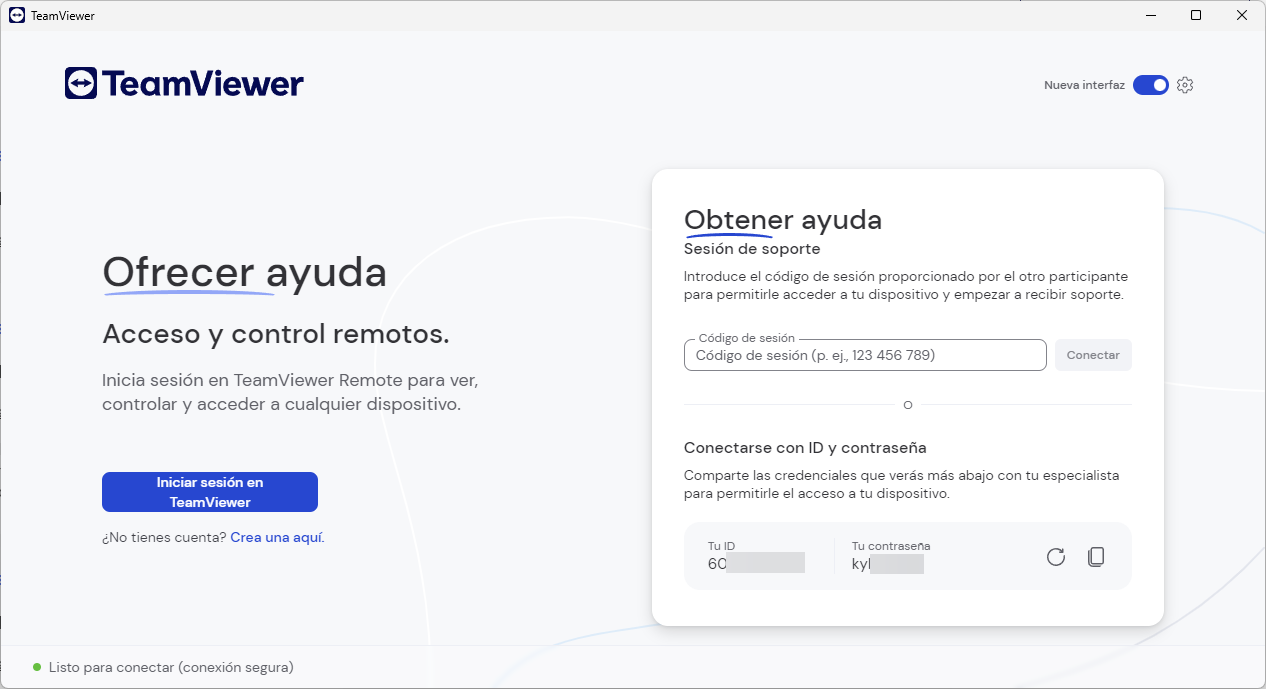
Open TeamViewer: When started for the first time, TeamViewer will display a screen with your TeamViewer ID and a temporary password. This combination is used for granting remote access to your device.
-
Configure unattended access (optional):
-
If you want to access your device at any time without requiring someone to be present for authorization, you can set up unattended access.
-
One of the crucial steps in securing remote access is disabling the random password option in TeamViewer’s settings. To do this, follow these steps:
- Go to Settings (⚙) ➜ Security ➜ Random password (for spontaneous access) and select Disabled (no random password). Finally, click Accept to apply the changes:
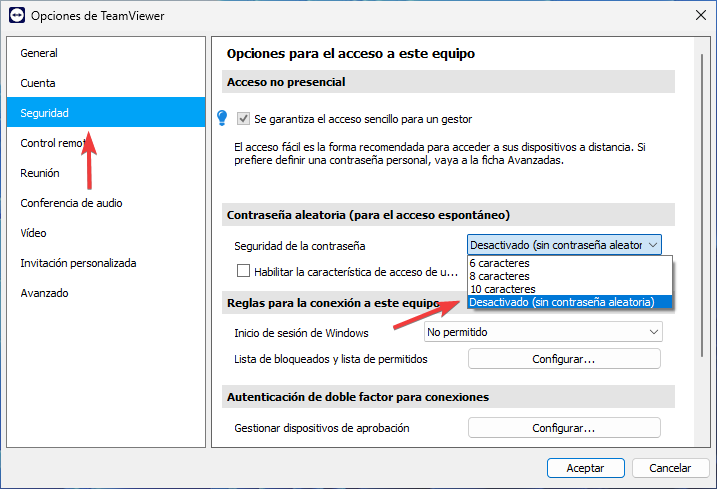
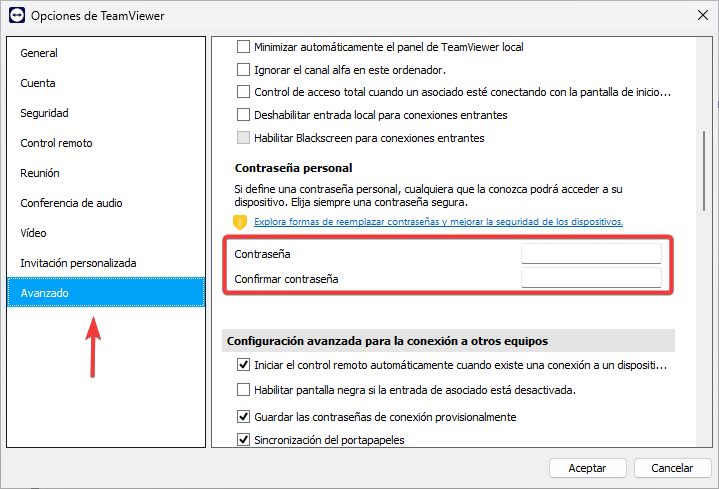
- This step is optional and is a recommendation if the host is linked to a TeamViewer account. If you choose to disable your personal password, it’s important to remove any additional passwords as well. You can disable both the “main” personal password and any extra passwords by going to Settings (⚙) ➜ Advanced Settings ➜ Personal Password:
- Link your TeamViewer account (if you have one) or create a new one to manage your remote devices.
-
Step 4: Connect to Another Device with TeamViewer
-
Obtain the ID and password of the remote device: To connect to another device, the other party must have TeamViewer installed and provide you with their TeamViewer ID and the generated password.
-
Enter the ID of the remote device: In the main TeamViewer window, you’ll see a field that says “Control a remote computer.” Input the ID you have been given.
-
Connect to the remote device: Click on Connect, and when prompted, enter the password for the remote device. This will allow you to control that device remotely.
Step 5: Advanced Configuration (optional)
TeamViewer offers several advanced options that you can customize according to your needs:
- Security settings: You can set restrictions for incoming connections and configure two-factor authentication for added security.
- Quick connections: Add frequently used devices to your list of Computers and Contacts for quicker access.
- Performance settings: TeamViewer automatically adjusts the connection quality based on available bandwidth. You can manually change these parameters in Display options.
We recommend considering AnyDesk as an alternative to TeamViewer, especially if you encounter connectivity issues or complex interfaces. AnyDesk offers a straightforward setup and robust performance, which can enhance your remote access experience.
- Published at