Ultimate-Cloud License: Creating and Managing Groups for Efficient User Role Allocation
Managing Groups
Applicable for users with an Enterprise-Cloud or Ultimate-Cloud license.
| To efficiently allocate roles to multiple users, creating a group is the way to go. Groups consist of a compilation of users with identical permission sets. By forming a group and assigning one or multiple roles, users can be added to the group, ensuring that all members of the group possess the same roles. |  |
|---|---|
| Create a GroupEdit a Group |
In this way, a user can be part of multiple groups.
Creating a Group
Follow these steps to create a group:
- In my.anydesk II account, navigate to Groups.
- Click on Create group, then in the pop-up window, provide the following information:
- Group name - Enter the name for your group.
-
Description - Provide a short description for the group.
- Click on Save group.
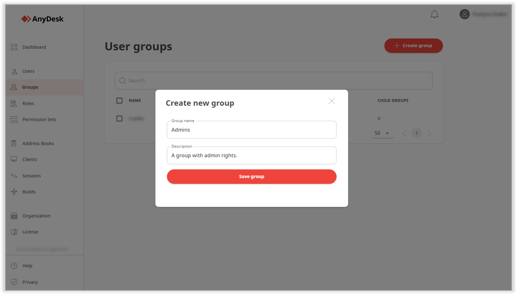
Afterward, users can be added to the group and roles can be assigned.
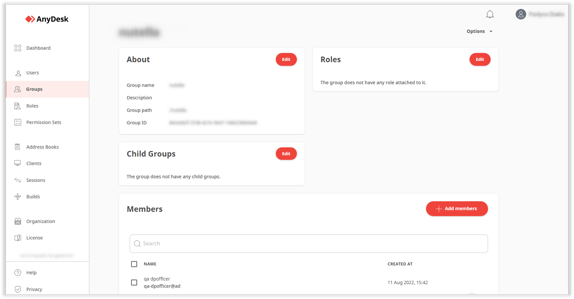
Editing a Group
You can modify group details such as changing its name and description, assigning roles, and adding members.
To edit a group, follow these steps:
- In my.anydesk II account, go to Groups.
- Open the required group for editing, then provide the following details:
- About - Edit the group’s name and description.
- Roles - Assign a role to the group, allowing for multiple roles to be assigned to one group.
- Child Groups - Create sub-groups within the main group with different roles.
-
Members - Add members to the group. Once added, the user assumes the same role as the group.
- Published at